If you're looking to update your home's flooring, tile floors can be a great option. It's sturdy, easy to clean, and comes in so many colors, prints, and textures. But what do you do if you want to remove your tile floor? Removing tile flooring can be an easy DIY project!
And if you're planning on taking on this project yourself, here are a few tips that will make the tile removal process a little easier but first, here's how you can remove your old tile flooring.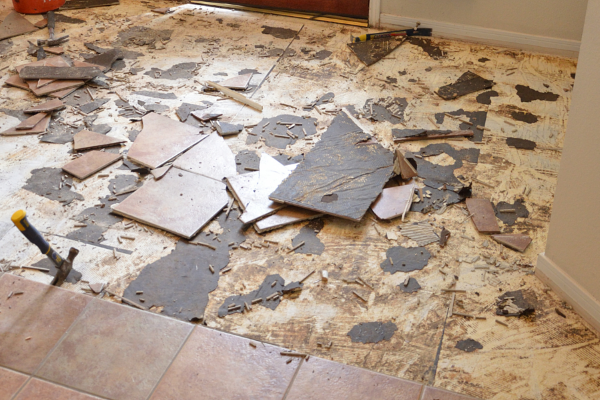
How to Remove Tile Flooring
Here is a step-by-step guide on how to remove your flooring safely and efficiently before you start laying new flooring in the room. This guide is applicable for all types of tiles, be it ceramic tile, porcelain tile, or natural stone tile.
1. Prepare the needed tools and equipment.
Removing tile flooring will call for some tools to make the process easy and possible.
You will need to prepare the following:
- Hammer/Drill with till bit
- Chisel
- Pry bar
- Floor scraper
- Vacuum or Broom and Dust pan
- Dust mask/Safety mask
- Safety goggles/Safety glasses
- Other power tools
2. Remove any fixtures.
Before you go on and start prying away at your tile floor, you will need to pry off any fixtures first. If you're working in your bathroom, the toilet needs to go off, and if you have a walk-in shower with the same tiles, those need to go off too.
3. Make your starting point.
Everything needs to start somewhere. To have a completely removed tile floor, you need to have a starting point. Pick a tile near the edge of the room and use your hammer or drill to create a hole in the tile. You can also just score the tile with your hammer to create a groove that you can pry open with your chisel.
4. Start removing the tile floor.
Now, it's time to put in some elbow grease. Old tiles of ceramic and porcelain may shatter in the process, so be careful. Use your chisel and pry bar to loosen the tile from its mortar bed, and then use your floor scraper to remove any residue or remaining adhesive. If the tile is still in good shape, you can always donate it or use it for another flooring project.
5. Assess the underlayment.
When you remove the tile flooring underneath, there will be some plywood underlayment that was used to protect your concrete floor. The underlayment is basically a layer between your concrete floor and your floor tiles.
You can either reuse this or replace it with a new one depending on its condition. If there are any nails or other sharp objects poking through, you will need to replace them.
6. Clean up debris.
No one said that removing tile flooring is easy. If anything, it can be a tough job, and there will surely be shards of tiles, shards of the plywood underlayment, and dust and debris from the cement board and grout. That said, you will need to go in with a vacuum or a broom to clean up the area before you can proceed to the next step.
7. Prep the area for new flooring.
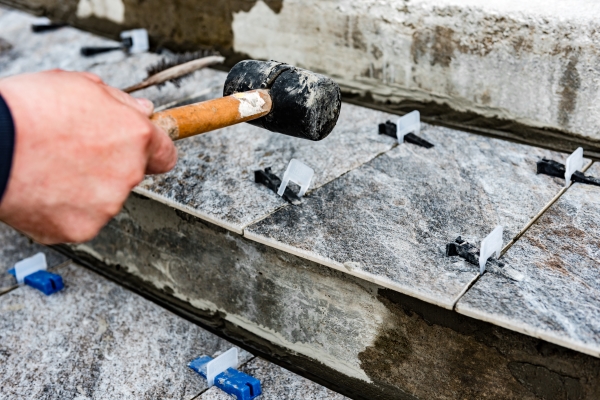
After you've removed all the tile flooring, it's time to prepare the area for your new floor. If you're installing a new tile floor, you will need to level the surface and make sure that there are no uneven spots. You can use a self-leveling compound to level the surface, or you can use a leveling system specifically made for tile floors.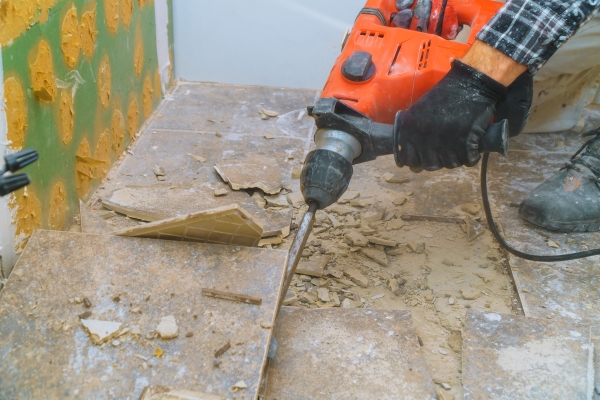
How Much Does it Cost to Hire a Professional to Remove Tile Flooring?
The average cost to hire a professional to remove tile flooring is $3.80 to $4.65 per square foot. However, the cost will still depend on the size of your project and the flooring types you have. If you have a larger project or if you have natural stone tile, the cost will, of course, be on the higher end.
Here's the usual cost range for different types of tile floors:
Ceramic tile: $1.50 to $4.15 per square foot
Porcelain tile: $3.90 to $4.40 per square foot
Natural stone tile: $4.50 to $5.00 per square foot
Asbestos Tile Flooring Removal Cost: $3.00 per square foot
The cost of removing tile flooring will also depend on the location of your project. If you're in a big city, the cost will be on the higher end since the demand is higher and there are more tile flooring companies to choose from. On the other hand, if you're in a rural area, the cost will be on the lower end since there are fewer companies to choose from.
To save on costs, you can try to remove the tile flooring yourself. However, if you're not familiar with the process, it's best to leave it to the professionals. Not only will they be able to remove the tile flooring quickly and efficiently, but they will also know how to dispose of the tile properly.
Make Removing Tile Floors Easy with These Tips
Removing tile floors can be a daunting task, but it doesn't have to be! With the right tools and a little bit of elbow grease, you can easily remove your old tile floor and prepare the area for new flooring. Here are some tips to make the whole process easier, budget-friendly, and worthwhile to do as a DIY project.
1. Prepare your home, not just the room or area where the tile floor is.
You will be dealing with a lot of dust, debris, and noise when removing tile floors, so it's best to prepare your home for it. Cover all your furniture and belongings in the room or area where the tile floor is located. Most of the time, when you are doing a flooring project, the existing underlayment or the tile flooring itself needs to be replaced too. These areas are usually the kitchen, bathroom, or a large common area. If you're replacing the tile flooring in these areas, then you will need to map up contingency plans for the flow of traffic, use plastic sheeting to cover doorways and use drop cloths to cover areas where you will be working.
It would be more economical to do one whole flooring project and not just one area because you will have all the furniture and belongings moved out already. Plus, it would be easier to match the new flooring when it's all from the same batch.
As an additional tip, it's actually cheaper to buy ceramic and porcelain tiles in bulk rather than in smaller amounts because most retailers give a discount for bulk purchases.
2. Make sure that all of your needed materials and equipment are within an arm's reach before you start.
You will be dealing with a lot of materials and equipment when removing tile floors, so it's important to have everything that you need within reach. This way, you won't have to stop in the middle of the project to look for something that you need.
3. Change the underlayment
It is possible to reuse the underlayment if it’s still in good shape, but it is advisable to change it, and, if you will, you must remove it properly.
When removing your underlayment, use a chisel and hammer, or a chisel set to remove the existing underlayment. The underlayment itself may have some adhesive, so you will need to remove any remaining adhesive with a floor sander and make sure you sand the areas in a single row for an even finish. A citrus-based adhesive remover typically works best for removing underlayment adhesive.
4. Check for asbestos
If your home was built before the 1980s, there's a chance that your tile flooring may contain asbestos. Asbestos is a hazardous material that can cause serious health problems, so it's important to have your tile flooring tested for asbestos before you begin the removal process. In any case, an asbestos abatement professional can remove the asbestos from your tile flooring before you begin the removal process.
5. Don't be shy to smash those tiles
Using a pry bar and a chisel and hammer is the way to go, but don't be afraid to go in with that hammer and just smash through those tiles. Using a chisel and hammer on each tile will be time-consuming and isn't really productive. Hit hard enough that the tiles will break into manageable pieces that you can pick up and put away and get rid of the rest.
After you have removed your old tiles, you will need to put them in a container that won't break or get pierced by the broken tile. This may seem like an extra step, but it’s for everyone's safety. Make sure that you gather them all up using safety gloves and clean them up with safety precautions. Use a long-handled floor scraper to avoid bending over too much.
Putting it in a sturdy container will not just protect you but as well as the garbage collectors who will pick them up. Additionally, you can also recycle your broken pieces of tiles and use them for art projects or decorations.
Final Tips
Removing tile flooring can be a daunting task, but if you follow these tips, you'll be able to get the job done quickly and safely. Make sure that you have all of your materials at hand before you start, and take care to remove the old underlayment properly. If your home contains asbestos, make sure to have it tested and removed by a professional before you begin the tile removal process. Finally, don't be afraid to ask for professional help if you need it. With these tips, you'll be able to remove your old tile floors and install new ones in no time.
3 comments